When it comes to capturing precious moments on our iPhones, sometimes a simple screenshot just isn’t enough. That’s where screen recording comes in handy. Whether you want to show off your gaming skills, create a tutorial for your followers, or just save a funny video for later, knowing how to screen record with audio on your iPhone 16 is essential.
In this blog post, I’ll walk you through the simple steps to achieve this on your iPhone 16. So, grab your phone, put on your recording voice, and let’s dive into the wonderful world of screen recording with audio on your iPhone 16!
Why Screen Record with Audio on iPhone 16?
You might have noticed that the ability to screen record with audio on your iPhone 16 can be a game-changer. Not only can you capture the visual aspect of your screen, but you can also include the audio, which adds an extra layer of depth to your recordings. Whether you’re showcasing a new app, recording a video call with a loved one, or creating a demo for work, having audio along with your screen recording can make all the difference.
How to Screen Record with Audio on iPhone 16
Now, let’s get into the nitty-gritty of how to screen record with audio on your iPhone 16. Follow these simple steps:
-
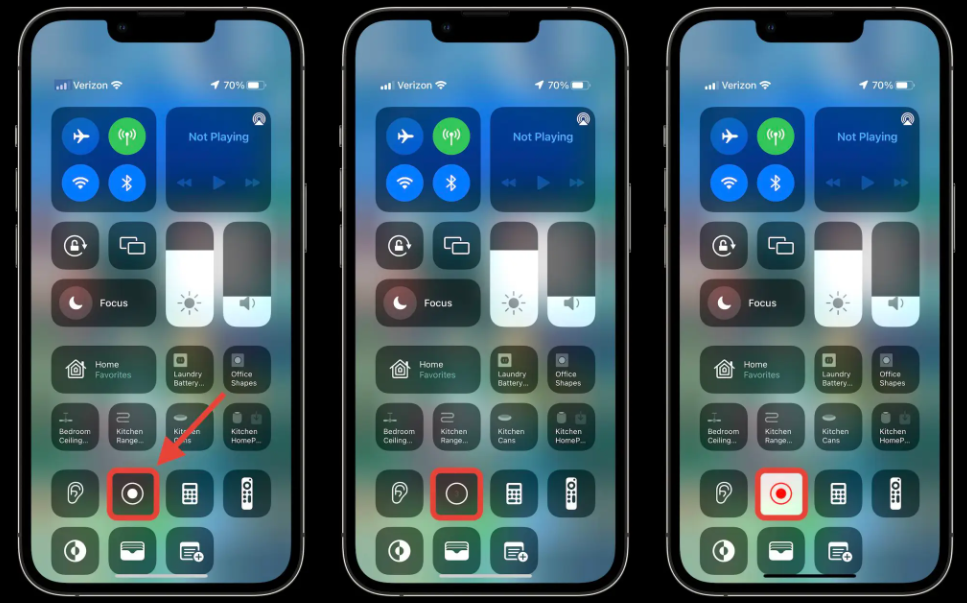
Open the Control Center on your iPhone 16 by swiping down from the top right corner of the screen.
-
Look for the Screen Recording icon, which looks like a circle with a dot inside it. Tap on it.
-
You’ll see a new window pop up with a red circle recording button. Before you start recording, long-press on the Screen Recording button.
-
A new menu will appear, giving you the option to turn on Microphone Audio. Make sure this toggle switch is on (green).
-
Once you’ve turned on Microphone Audio, tap Start Recording.
-
Your iPhone will now begin recording the screen along with any audio that is playing.
Tips for a Successful Screen Recording with Audio
To ensure that your screen recording with audio on your iPhone 16 is top-notch, here are a few tips to keep in mind:
-
Make sure your iPhone is fully charged before you start recording to avoid interruptions.
-
Close any unnecessary apps running in the background to free up memory and resources.
-
Consider using headphones with a built-in microphone for better audio quality.
-
Practice your screen recording a few times to get the hang of it before recording something important.
What This Means for You
Having the ability to screen record with audio on your iPhone 16 opens up a world of possibilities. From creating engaging content for social media to troubleshooting tech issues with friends, the sky’s the limit. So, don’t be afraid to get creative and explore all the ways you can use this feature to your advantage.
Conclusion: Go Forth and Record!
Now that you know how to screen record with audio on your iPhone 16, it’s time to put your newfound skills to use. Whether you’re a content creator, a tech enthusiast, or just someone who loves capturing memories, this feature is sure to come in handy. So, grab your iPhone, hit that record button, and let your creativity shine!
What are your thoughts on this trend? Let me know what you’d choose.