In the digital age, data loss can be catastrophic. Whether it’s due to a hardware failure, accidental deletion, or even theft, losing important files can be devastating. Thankfully, Apple offers two powerful backup solutions for Mac users: Time Machine and iCloud. These built-in tools make it easy to safeguard your data and ensure you can recover it when things go wrong. In this guide, we’ll walk you through how to use both Time Machine and iCloud to back up your Mac and protect your valuable information.
For more insights into how the Apple Watch fits into your ecosystem, check out this detailed Apple Watch SE 2nd Gen review.
What Are Time Machine and iCloud?
Both Time Machine and iCloud are essential tools in the Apple ecosystem designed to keep your Mac and personal data safe. Let’s break down what each one does:
Time Machine:
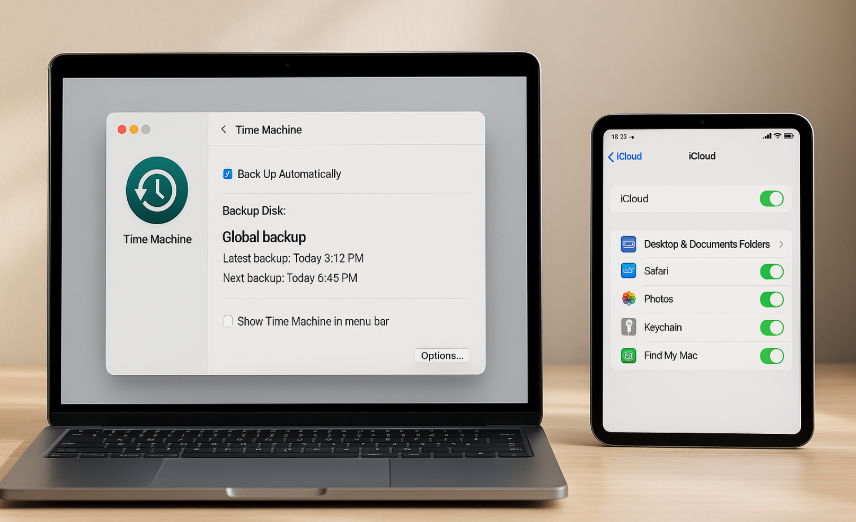
Time Machine is Apple’s built-in backup solution that automatically backs up your entire Mac, including system files, applications, documents, and settings. It keeps hourly backups for the last 24 hours, daily backups for the past month, and weekly backups for up to a year. Time Machine also allows you to restore lost files, recover an entire system, or even revert your system to a previous state.
iCloud:
iCloud is Apple’s cloud storage service that syncs and backs up your files, photos, documents, and more across all your Apple devices. Unlike Time Machine, which backs up everything on your Mac to an external device, iCloud offers cloud-based backup and file synchronization. It automatically uploads your documents, photos, and settings to the cloud, making it easy to access and recover your data from any Apple device.
Together, these two solutions offer a comprehensive backup strategy, combining the local, automatic backups of Time Machine with the cloud-based security of iCloud.
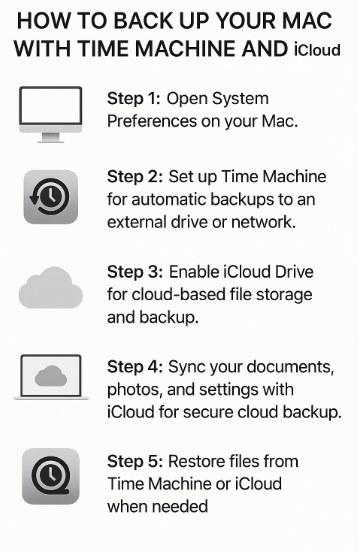
Step 1: Setting Up Time Machine for Local Backups
Time Machine is the first line of defense against data loss, and setting it up is simple. Here’s how to get started:
- Connect an External Drive:
- To back up your Mac, you’ll need an external hard drive or a network-attached storage (NAS) device.
- Plug the external hard drive into your Mac using a USB, Thunderbolt, or other compatible port.
- Activate Time Machine:
- Open System Preferences on your Mac.
- Click on Time Machine.
- Select Select Backup Disk and choose your external drive.
- You may be asked to format the disk; if so, confirm that you want to use it for Time Machine backups.
- Set Up Automatic Backups:
- Check the box for Back Up Automatically to ensure that Time Machine will run backups every hour without you needing to intervene.
Once set up, Time Machine will automatically back up your Mac every hour, ensuring that all your files, applications, and settings are safe.
Step 2: Using Time Machine to Restore Files or Entire System
If something goes wrong and you need to recover lost files, Time Machine makes it easy:
- Access Time Machine:
- Click the Time Machine icon in the menu bar and select Enter Time Machine. Alternatively, you can search for Time Machine using Spotlight.
- Navigate Through Backups:
- Use the timeline on the right side of the screen to go through your backups. You can view backups by day, week, or month.
- Use the arrows to browse through previous versions of files and folders.
- Restore Files:
- Find the file or folder you want to restore and click the Restore button. Time Machine will copy it back to its original location on your Mac.
- Restore Your Entire System:
- If your Mac has been damaged or wiped, you can restore your entire system using Time Machine during the macOS recovery process. This will restore all your apps, settings, and files to the exact state they were in when the backup was made.
Step 3: Setting Up iCloud for Cloud Backups
While Time Machine covers your local backups, iCloud ensures your important data is safely stored in the cloud. To set up iCloud on your Mac:
- Enable iCloud:
- Open System Preferences and select Apple ID.
- Sign in with your Apple ID if you haven’t already.
- Select iCloud and ensure that the services you want to back up (such as iCloud Drive, Photos, Contacts, and Calendars) are enabled.
- Choose What to Sync:
- Under iCloud, you can select specific apps and data that will sync across all your Apple devices. This includes documents, photos, contacts, and even your Safari bookmarks.
- Automatic Syncing:
- iCloud will automatically upload and sync your files, photos, and other selected content to the cloud, so you can access it from your iPhone, iPad, or any other Apple device.
- Storage Management:
- You receive 5GB of free iCloud storage, but you can purchase more if needed. To manage your storage, go to System Preferences > Apple ID > iCloud > Manage Storage to see what’s using your space.
Step 4: Using iCloud for File Sharing and Recovery
In addition to cloud backup, iCloud allows you to store documents, photos, and more, making it easy to access and share files between your Apple devices:
- Access Files on Multiple Devices:
- Any files stored in iCloud Drive are accessible on your Mac, iPhone, iPad, or even Windows computers via iCloud for Windows.
- Recover Deleted Files:
- If you delete a file from your iCloud Drive, you can recover it within 30 days by accessing the Recently Deleted folder in iCloud.
- iCloud Photo Library:
- With iCloud Photos, all your pictures and videos are automatically uploaded to the cloud, keeping them safe and accessible from all your Apple devices.
Step 5: Combining Time Machine and iCloud for Maximum Security
The best way to safeguard your Mac is by combining both Time Machine and iCloud. While Time Machine handles the local backups and full system restores, iCloud offers cloud-based access to your data, ensuring it’s always available when you need it, whether you’re at home or on the go.
By using both tools, you get a comprehensive backup strategy that covers both local data and cloud storage. This hybrid approach ensures that even if one method fails, the other will provide the necessary backup to restore your data.
Step 6: Troubleshooting Backup Issues
While both Time Machine and iCloud are designed to work seamlessly, you may encounter some issues. Here are some common troubleshooting tips:
- Time Machine Not Backing Up:
- Ensure your external drive is properly connected and recognized by your Mac.
- Check if the backup disk is full. If it is, Time Machine will automatically delete older backups.
- Restart your Mac and try to initiate a backup manually.
- iCloud Storage Full:
- If you run out of iCloud storage, either delete old files or purchase more storage through System Preferences > Apple ID > iCloud > Manage Storage.
- Restoration Problems:
- If you encounter issues during restoration, try restarting your Mac and using macOS Recovery to access Time Machine backups or re-sync your iCloud data.
Conclusion: Protect Your Mac with Time Machine and iCloud
Using Time Machine and iCloud together provides the ultimate protection for your Mac and its data. Time Machine’s local backups allow for easy recovery of files and system restores, while iCloud keeps your important documents and photos safely stored in the cloud, accessible across all your devices. Together, they offer a comprehensive backup solution that ensures your Mac is always protected and your data is recoverable when needed.
For more tips on maximizing your Apple ecosystem, check out these related articles: