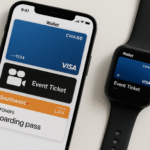
In today’s fast-paced world, convenience is key, and Apple Pay on your Apple Watch takes convenience to the next level. With the ability to make contactless payments directly from your wrist, Apple Watch allows you to leave your wallet and phone at home, making your transactions faster, safer, and easier. Whether you’re grabbing a coffee or making a large purchase, Apple Pay ensures that payments are as simple as double-tapping your wrist.
For more insights into the Apple Watch’s capabilities, check out this detailed Apple Watch SE 2nd Gen review.
What Is Apple Pay on Apple Watch?
Apple Pay is a secure and easy way to pay for goods and services using your Apple Watch. It leverages Near Field Communication (NFC) technology, allowing you to make payments with a simple tap of your wrist at any contactless payment terminal. By linking your credit card, debit card, or Apple Card to your Apple Watch, you can use it for payments at millions of locations worldwide.
Apple Pay provides an enhanced level of security as it doesn’t transmit your actual credit or debit card number. Instead, it uses a unique device number and encrypted transaction data, ensuring that your payment information remains safe and protected.
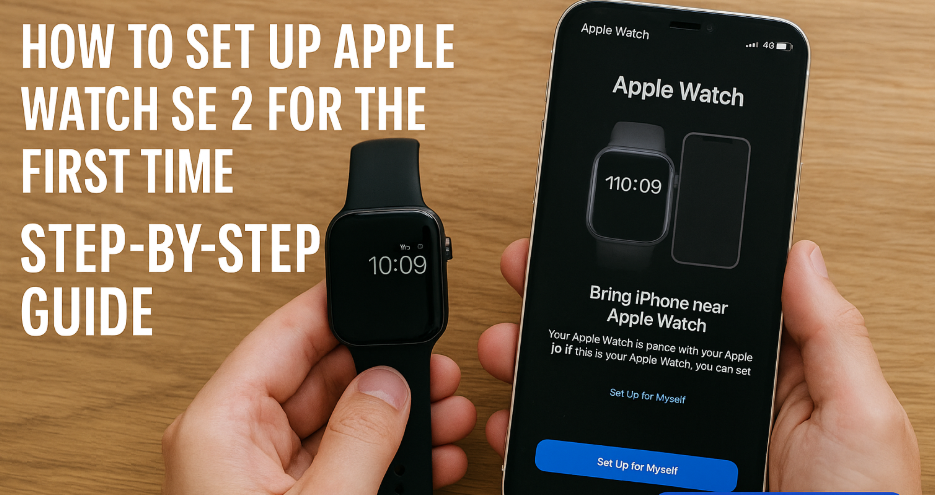
Step 1: Setting Up Apple Pay on Your Apple Watch
Setting up Apple Pay on your Apple Watch is quick and easy. Follow these steps to get started:
On Your iPhone:
- Open the Watch App: On your iPhone, open the Watch app and select Wallet & Apple Pay.
- Add a Card: Tap Add Credit or Debit Card. You can either scan your card using your iPhone’s camera or manually enter the details.
- Verify Your Card: Follow the prompts from your bank or card issuer to verify your card. This may involve receiving a verification code via SMS or email.
On Your Apple Watch:
- Enable Apple Pay on Your Watch: Once your card is added to the Watch app on your iPhone, the same card will appear in the Wallet app on your Apple Watch.
- Set Up a Passcode: To use Apple Pay, your Apple Watch must have a passcode set for security reasons. If you haven’t already set one up, go to Settings on your Apple Watch and select Passcode to set one.
Step 2: Making Payments with Apple Pay on Your Apple Watch
Once you’ve set up Apple Pay, making payments with your Apple Watch is simple. Here’s how:
- Activate Apple Pay: To activate Apple Pay on your Apple Watch, double-tap the side button (the button below the Digital Crown).
- Select Your Card: If you have multiple cards stored on your Apple Watch, you can swipe to select the card you want to use for the transaction.
- Hold Near Reader: Hold your Apple Watch near the contactless payment reader. Your watch will vibrate and display a checkmark when the payment is successful.
- Confirm Payment: If necessary, enter your Apple Watch passcode to authorize the payment.
The entire process takes only a few seconds, and it’s more secure than swiping a physical card, thanks to tokenization and encrypted data.
Step 3: Managing Your Apple Pay Settings on Apple Watch
Apple Pay offers several management options to make your experience even smoother. You can control how Apple Pay functions across your Apple devices, including your Apple Watch. Here’s how:
Add or Remove Cards:
- Open the Watch app on your iPhone, go to Wallet & Apple Pay, and tap on the card you want to remove or add another one. You can add multiple cards to your Apple Watch, making it easy to choose the right one for each transaction.
Set Default Card:
- If you have multiple cards linked to Apple Pay, you can set a default card for your Apple Watch. Go to Settings > Wallet & Apple Pay on your iPhone, tap Default Card, and select the card you prefer.
View Transaction History:
- You can view your recent Apple Pay transactions through the Wallet app on your Apple Watch or the Apple Pay section of the Wallet app on your iPhone.
Step 4: Using Apple Pay with Other Apple Devices
Apple Pay isn’t just limited to your Apple Watch. You can use it on your iPhone, iPad, Mac, and even your Apple TV to make purchases or payments. Here’s how the integration works:
- On iPhone: Use Apple Pay to make purchases in apps or websites that support it. Simply double-tap the Side Button on your iPhone, use Face ID or Touch ID, and confirm your payment.
- On Mac: On Macs with Touch ID, you can use Apple Pay to complete purchases on supported websites. Simply click the Apple Pay button during checkout and authenticate using Touch ID.
- On Apple TV: Use Apple Pay to make purchases on the Apple TV, like buying apps, content, or subscriptions. Use Siri Remote for authentication and confirm with Apple Pay.
Step 5: Troubleshooting Common Issues with Apple Pay on Apple Watch
While Apple Pay is designed to work seamlessly, you may encounter occasional issues. Here are some common troubleshooting tips:
- Apple Pay Not Working on Apple Watch:
- Ensure that your Apple Watch is paired with your iPhone and both are signed into the same Apple ID.
- Check that your iPhone and Apple Watch are connected to the same Wi-Fi network or Bluetooth.
- Apple Pay Not Accepting Payments:
- Ensure that NFC (Near Field Communication) is enabled on your Apple Watch and that the payment terminal supports contactless payments.
- Make sure your Apple Watch passcode is set, as it’s required for Apple Pay transactions.
- Apple Pay Not Syncing Between Devices:
- Double-check that you’ve added the correct card on both your iPhone and Apple Watch. If syncing issues persist, try removing and re-adding the card.
Conclusion: The Power of Apple Pay with Apple Watch
Managing Apple Pay with your Apple Watch offers unmatched convenience, allowing you to make secure, contactless payments with just a tap of your wrist. Whether you’re buying groceries, paying for a coffee, or making a large purchase, Apple Pay on your Apple Watch provides a fast and secure payment solution that’s integrated seamlessly into your Apple ecosystem.
By following the simple steps above, you can quickly set up Apple Pay on your Apple Watch, manage your cards, and enjoy the convenience of paying securely and efficiently from your wrist. If you’re looking to get the most out of Apple Pay, remember that it’s compatible with other Apple devices like iPhone, iPad, and Mac, allowing for a truly connected experience.
For more tips on how to optimize your Apple ecosystem, check out these related articles: