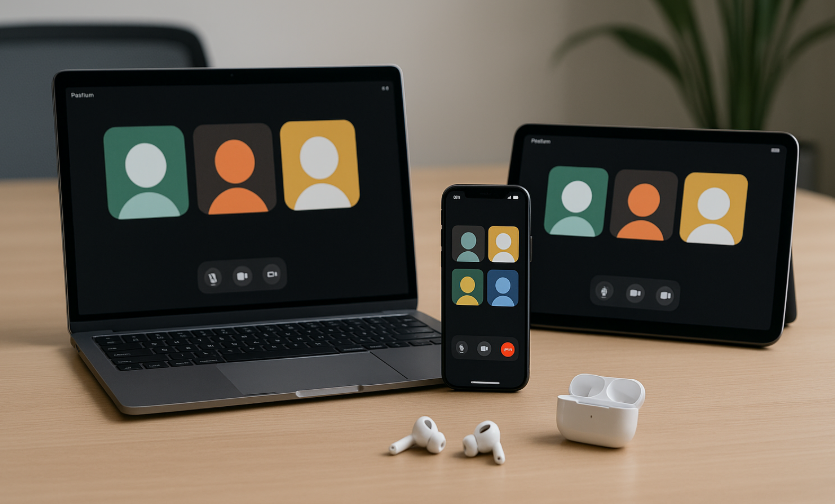
In the modern work environment, conference calls are essential for collaboration. With Apple’s AirPods, users can enjoy seamless and high-quality audio across various devices, including macOS, iPhone, and iPad. Whether you’re joining a meeting from your MacBook, hopping on a call from your iPhone, or attending a remote meeting via iPad, optimizing AirPods can significantly improve the clarity and experience of your conference calls.
To ensure you’re getting the best performance from your AirPods during meetings, follow this comprehensive guide on optimizing AirPods for conference calls across Apple devices.
For a deeper dive into Apple’s ecosystem, consider reading our Apple Watch SE 2nd Gen Ultimate Review.
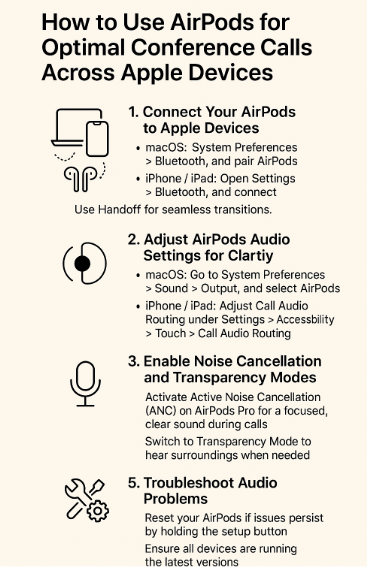
Step 1: Connect Your AirPods to Apple Devices
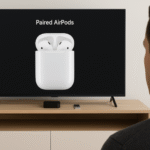
The first step in optimizing AirPods for seamless conference calls is ensuring that they are properly connected to your Mac, iPhone, or iPad. Apple’s ecosystem allows you to connect multiple devices, but proper pairing is crucial for smooth audio.
How to Connect AirPods to macOS:
- Open System Preferences > Bluetooth.
- Ensure your AirPods are in pairing mode and select them from the available devices list.
- Set AirPods as your audio output device in System Preferences > Sound.
How to Connect AirPods to iPhone/iPad:
- Open Settings > Bluetooth.
- Toggle Bluetooth ON and select AirPods from the list of available devices.
- Ensure AirPods are set as the audio output in Control Center by selecting AirPods.
Tip: If you’re switching between devices during a call, Handoff can be used to seamlessly transition between your devices without dropping the call.
Step 2: Adjust Audio Settings for Maximum Clarity
After pairing your AirPods with your Apple devices, it’s time to adjust your audio settings for optimal call quality. AirPods offer features that can improve sound clarity, such as active noise cancellation (ANC) and spatial audio.
How to Adjust Audio Settings on macOS:
- Go to System Preferences > Sound.
- Select AirPods as the output device.
- Ensure that input is set to AirPods for clear voice transmission.
- Test sound quality by playing a voice memo or initiating a test call.
How to Adjust Audio Settings on iPhone/iPad:
- Open Settings > Accessibility > Audio/Visual.
- Adjust Call Audio Routing to Automatic for seamless switching during calls.
- In Settings > Bluetooth, you can also toggle Noise Cancellation to improve call clarity.
Step 3: Enable Noise Cancellation and Transparency Modes
Active Noise Cancellation (ANC) is a game-changer for AirPods Pro users during conference calls, especially in noisy environments. With ANC, background noise is minimized, ensuring a clearer audio experience. On the other hand, Transparency Mode allows you to hear your surroundings, which can be helpful when you need to be aware of your environment while on a call.
How to Enable ANC and Transparency Mode on AirPods Pro:
- Place your AirPods Pro in your ears.
- Open Control Center on your iPhone/iPad.
- Tap the ear icon to toggle between Noise Cancellation and Transparency Mode.
Tip: If you’re attending a conference call from a crowded space, Noise Cancellation will block out most of the environmental sound, allowing you to focus better on the conversation.
Step 4: Test Audio Quality and Adjust Microphone Settings
Before joining a conference call, it’s essential to test the audio quality and ensure that the microphone on your AirPods is functioning properly. This will prevent any interruptions or poor audio quality during the meeting.
How to Test Audio Quality on Mac:
- Open System Preferences > Sound.
- Click on Input, and select AirPods as the microphone.
- Speak into your AirPods and observe the input level.
How to Test Audio Quality on iPhone/iPad:
- Open Voice Memos.
- Record a test message and listen for clarity and sound quality.
Tip: If you notice that the microphone is not picking up sound clearly, try resetting your AirPods by holding down the setup button at the back of the case for 15 seconds, then reconnecting.
Step 5: Troubleshoot Common AirPods Issues
Despite their reliability, AirPods can occasionally face connectivity issues or experience poor audio quality during conference calls. Here are some common problems and solutions:
AirPods Not Connecting:
- Solution: Make sure Bluetooth is turned on. Reset AirPods by holding the setup button until the light flashes amber, then reconnect.
Poor Audio Quality:
- Solution: Ensure that Noise Cancellation or Transparency Mode is set correctly. Also, check the audio input/output settings on your Mac, iPhone, or iPad.
Call Dropping:
- Solution: Check for Wi-Fi or cellular network issues. Ensure that Handoff is enabled for seamless device switching.
FAQs on Using AirPods for Conference Calls Across Apple Devices
1. How do I use AirPods with multiple Apple devices?
Ensure Handoff is enabled across your devices, and make sure all devices are signed into the same Apple ID. You can switch between Mac, iPhone, and iPad without losing the call.
2. Can I use AirPods for conference calls on macOS?
Yes, simply select AirPods as the output device in System Preferences > Sound on macOS.
3. Why is the audio quality bad during calls on my AirPods?
Make sure Noise Cancellation is activated if you’re in a noisy environment. Also, check that the microphone and audio settings are configured correctly.
4. How do I improve AirPods connectivity during calls?
Ensure that Bluetooth and Wi-Fi are both enabled, and consider resetting your AirPods if issues persist.
5. Can I use AirPods Pro for conference calls?
Yes, AirPods Pro is ideal for conference calls due to Active Noise Cancellation. Ensure it’s activated for optimal audio clarity.
Conclusion: Optimizing AirPods for Seamless Conference Calls
AirPods are an excellent tool for conference calls across the Apple ecosystem, offering seamless integration with macOS, iPhone, and iPad. By following these tips to connect, adjust settings, and test audio quality, you can ensure a clear, uninterrupted conference call experience.
For more detailed advice on Apple device integration, check out our related articles: