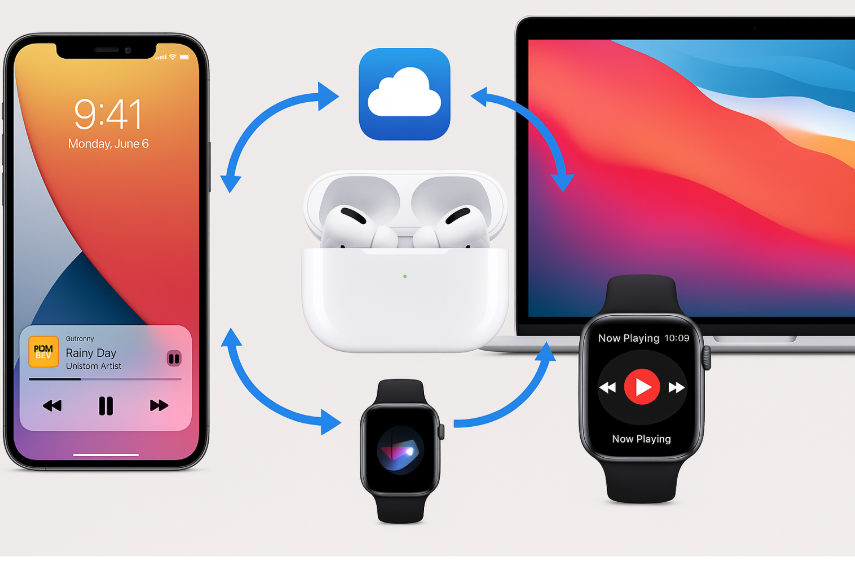
Apple’s ecosystem is designed to work seamlessly across its devices, and AirPods Pro is no exception. One of the standout features of AirPods Pro is its ability to integrate effortlessly with iPhone, Mac, Apple Watch, and other Apple devices, ensuring a smooth audio experience.
With AirPods Pro, you can sync your audio preferences (such as Noise Cancellation, Transparency Mode, and Spatial Audio) across all your devices, enabling you to switch between devices without losing your preferred audio settings. This level of integration is a game-changer for those who use multiple Apple devices throughout the day.
For a comprehensive guide to Apple’s ecosystem, check out the Apple Watch SE 2nd Gen Review.
Step 1: Set Up iCloud Sync Across Apple Devices
To ensure your AirPods Pro audio settings are synced across all your devices, the first step is to make sure that iCloud sync is activated.
- Sign into iCloud on all devices using the same Apple ID.
- Ensure that Bluetooth is enabled on each device and that AirPods Pro is paired.
iCloud will allow you to sync preferences like Noise Cancellation, Spatial Audio, and Transparency from your iPhone to your Apple Watch, Mac, and iPad.
Step 2: Customize Audio Preferences on iPhone
Your iPhone is where the majority of AirPods Pro audio customization takes place. Once your AirPods Pro are paired with your iPhone, you can fine-tune the settings to match your needs.
- Open Settings > Bluetooth: Find your AirPods Pro under Devices.
- Noise Cancellation & Transparency: You can adjust the Noise Cancellation and Transparency modes directly from the AirPods Pro settings on your iPhone.
- Spatial Audio: If you have a compatible device, turn on Spatial Audio for an immersive, surround-sound experience.
Once configured, your iPhone settings will sync automatically across all Apple devices, provided that they are connected via iCloud.
Step 3: Sync Audio Preferences on Apple Watch
One of the biggest advantages of the Apple Watch is its ability to control AirPods Pro settings directly from your wrist. After setting up iCloud sync on your iPhone, the audio preferences will be available on your Apple Watch.
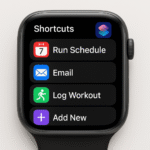
- Open the Now Playing app on your Apple Watch to access your AirPods Pro settings.
- You can adjust audio settings like Noise Cancellation and Transparency from your wrist without touching your phone.
- Ensure that Spatial Audio settings are enabled on your iPhone for the feature to sync to your Apple Watch.
Now, you can easily toggle between modes like Noise Cancellation and Transparency directly from your Apple Watch, perfect for on-the-go adjustments.
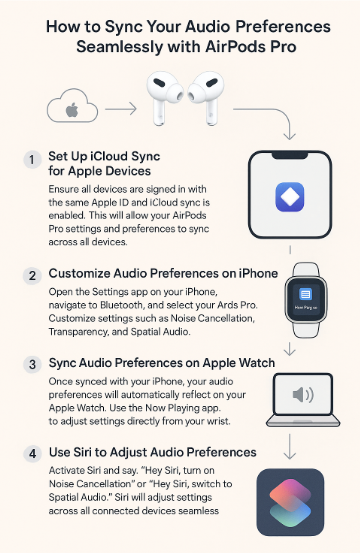
Step 4: Use Siri for Hands-Free Audio Control
Siri is an invaluable tool for controlling your AirPods Pro audio preferences, making it even easier to sync and adjust settings across all your Apple devices. With Siri, you can trigger audio settings without having to physically interact with your devices.
- Activate Siri by saying “Hey Siri“.
- Commands such as “Hey Siri, turn on Transparency Mode” or “Hey Siri, switch to Noise Cancellation” will adjust the settings automatically on your AirPods Pro.
- Siri also works seamlessly across all devices, so if you switch from your iPhone to your Apple Watch, Siri will adjust your audio settings to match.
This voice-activated feature ensures that you can stay in control of your audio preferences without ever lifting a finger.
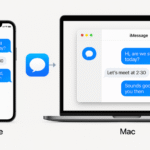
Step 5: Fine-Tune Audio Settings on Mac
When using AirPods Pro with your Mac, it’s important to fine-tune audio settings to match your preferences. While you can adjust basic settings via the Sound menu in System Preferences, Noise Cancellation and Transparency can be set from iPhone and Apple Watch and will sync across devices.
- Select AirPods Pro as your audio output device in System Preferences > Sound.
- Use the Mac’s volume controls to adjust the overall audio level.
- For detailed Spatial Audio control, ensure Spatial Audio is enabled in your iPhone settings as it syncs automatically with your Mac.
Whether you’re listening to music or joining a video call, the AirPods Pro audio preferences will carry over seamlessly to your Mac, providing a personalized and consistent audio experience.
FAQs About Syncing Audio Preferences with AirPods Pro
1. Can I use AirPods Pro with multiple devices at once?
Yes, AirPods Pro can connect to multiple devices at the same time, and the settings will sync across your iPhone, Mac, Apple Watch, and iPad.
2. How do I ensure my AirPods Pro settings sync across devices?
Make sure you are logged into the same Apple ID and that iCloud sync is enabled. This allows settings like Noise Cancellation and Spatial Audio to sync seamlessly.
3. Can I control AirPods Pro audio settings on my Apple Watch?
Yes, you can control Noise Cancellation, Transparency, and other audio settings from your Apple Watch via the Now Playing app.
4. Can Siri adjust the AirPods Pro settings?
Yes, you can use Siri to activate modes like Noise Cancellation and Transparency hands-free on your AirPods Pro.
5. Will my AirPods Pro settings sync to other devices like my Mac?
Yes, once configured on your iPhone, your AirPods Pro settings will sync automatically across all devices, including Mac and Apple Watch.
Conclusion: Enjoy Seamless Audio Control with AirPods Pro
Syncing your AirPods Pro audio preferences across devices is one of the key benefits of using the Apple ecosystem. By leveraging features like iCloud sync, Siri control, and Apple Watch integration, you can create a seamless and personalized audio experience. Whether you’re listening to music, taking calls, or enjoying Spatial Audio, your settings will follow you across devices, ensuring the best experience possible.
To explore more ways to integrate Apple devices, check out the following articles: